Search
Found 44 results for Effect
https://www.animestudiotutor.com/animation/how_to_make_a_candle-lighter_f/
8 July 2012ShoNuff93
This is a tutorial on how to make a flame in anime studio using one layer and the noise effect tool.
https://www.animestudiotutor.com/layers/shading_effects/
6 June 2012LilredheadComics
Anime Studio allows you to apply shading effects in a few different ways. This tutorial shows you how to apply them with both layer and paint bucket tool effects.

https://www.animestudiotutor.com/interface/styles_enhancements/
16 August 2013Smith Micro Graphics
UPDATED in Anime Studio 9.5 - Improvements to Styles now allow you to see real-time changes to shape's fill color, stroke color, brush settings, etc. on the canvas so you can see exactly what effect your changes will have.
Anime Studio 9.5 Now Out!
https://www.animestudiotutor.com/particles/how_to_make_a_flamethrower_ii/
8 July 2012ShoNuff93
Part 2: This is a video tutorial on how to make a flamethrower or blow torch type of effect in anime studio using particles and layer effects.
How To Make A Flamethrower: Part 1
https://www.animestudiotutor.com/special_effects/layer_blending_effects/
8 February 2016AnimeStudioTutor
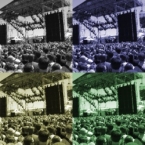
In this tutorial you will see how easy it is to use the layer blending modes in Anime Studio to change the colour of your animations.
Normally these effects would be added to your rendered videos in a video editor. But knowing how to do it in Anime Studio may come in handy.
This effect can be added to the whole video or you could use it in isolation.
https://www.animestudiotutor.com/masking/hiding_assets_with_masking_in_anime_studio/
21 December 2013LilredheadComics
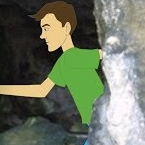
Have you ever brought an image into Anime Studio and wished you could somehow make a character or object appear behind one part of the image, while still being revealed in another? While you could go into another software and break this image apart, you can also achieve the effect through masking, without having to leave Anime Studio. This tutorial shows you how to create an invisible mask and allow a character to run behind a pillar on a static bitmap image.
Recorded By: Jim Mills
Narrated By: Chad Troftgruben
https://www.animestudiotutor.com/animation/animate_breaking_glass_in_moho_anime_studio_pro/
20 October 2016ShoNuff93
Here is a tutorial for those of you wanting to create shattered glass. You can do this in older versions of Anime Studio but you must have Pro so that you can use physics.
You can also adapt this to other objects you want to destroy or create fragments with.
Itty Bitty 8 Bit by Kevin MacLeod is licensed under a Creative Commons Attribution license | Source | Artist
https://www.animestudiotutor.com/layers/layer_ordering_for_beginners/
10 August 2012AnimeStudioTutor
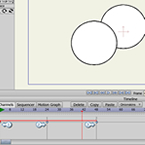
This is a basic tutorial on setting up Anime Studio to allow animated layers.
Once layer ordering has been turned on, any re-ordering of the layers will be recorded.
For example, if you move 5 seconds into the animation, and move a layer from the bottom of the group to the top, a key point would be added. When the animation reaches this point that layer will go from the bottom to the top - i.e. from the back to in front.
https://www.animestudiotutor.com/special_effects/make_characters_slowly_fade_through_walls/
20 October 2016ShoNuff93
If you are wanting to animate a character or object slowly appear or disappear you can try using this technique.
You MUST have Anime Studio 11 Pro or MOHO 12 Pro to do this as it uses the new color points tool!
This tutorial uses a combination of masking, color points and some layer settings to achieve this effect.
Spooky Ride by Twin Musicom is licensed under a Creative Commons Attribution license |
Source |
Artist

https://www.animestudiotutor.com/layers/techniques_for_creating_light_and_shadow_effects/
28 April 2019ShoNuff93
This is another "sort of" lighting and shadow tutorial. I probably could make a whole series on just lighting effects but I think these, in particular, are pretty useful and easy to do.
The first technique I show you is how to use just a simple cut out shape to create a spotlight. I've made a tutorial about this before but it's a good refresher.
The second little technique is creating shadows for a moving character. Yes, you can use the built-in shadow effect but this video shows you how to create a shadow that's a little more dynamic so you can place it anywhere you like.
And the last technique is creating police lights or flashing lights. It's just a little more tricky because it involves some masking and changing layer blending modes, but once you get it
Showing tutorials 31 to 40 of 44