Search
Found 98 results for ShoNuff93
https://www.animestudiotutor.com/masking/making_the_lantern_background/
20 July 2016ShoNuff93
This tutorial is to show you all how to use masking to create a gradient lighting effect that you would use for making flashlight or torch effects. It's pretty simple to achieve but you need to make two separate pieces of artwork .
You can do this by using another program such as Illustrator like I did or you can do it in Anime Studio by creating a background, duplicating and then changing all of the colors. I just used Illustrator because it's much easier for me to create backgrounds in it!
Once you've done this, you really only need to use a mask and use the LAYER blur function to make it look more realistic. (if that's what you're going for.)
As always, when you think of masking always remember it is a way to hide or reveal things!!!!!!!!
Echoes of Time by Kevin MacLeod is licensed under a Creative Commons Attribution license
Source | Artist

https://www.animestudiotutor.com/drawing/making_south_park_characters_in_moho_part_2/
3 December 2017ShoNuff93
So here is the second part of making a SouthPark character, you guys. I apologize that it's so long but I try not to edit my videos so you can see how long it actually takes me to do something. I have one more part to go and I hope it's not too long but once it is done you'll hopefully know how to make any type of Southpark character pretty easy.
Keep in mind this is just how I would do it. I'm sure there are several ways to make characters like this but this is just the way I came up with.
The next video I'll be making clothes accessories and just showing how to move the character around!
I know some of you aren't Southpark fans but there are still some good tips and tricks that you can learn from this. The main one being about group layers and swapping out accessories. Anyway, hope some of you find this useful and if you have any questions leave them down below or write to me at www.facebook.com/poptoogi
https://www.animestudiotutor.com/bones/rag_doll_physics_on_a_character/
14 October 2018ShoNuff93
This is another physics-based tutorial in which you learn how to add physics to your character inside of an animation. You need to have the pro version of Anime Studio pro (at least version 9 I think) or MOHO 12 pro in order to use the built in physic engine.
This tutorial is easy to use but the results can vary widely due to the fact that physics animations just do what they want but that's the fun part! Playing with just a couple of settings can really change the outcome of your animations in just seconds. Sometimes they look great and sometimes they can be a twitchy mess. But if you looking for a fun easy way to automatically generate a character falling or have an object to explode, physics is the way to go!
Just play with it and have fun! Couple of things to REMEMBER, you need to have bone strength turned on for a rigged character to have physics applied to it. Also, while a character is being affected by physics you can NOT animate it! Pose your characters before and after physics is turned on!
https://www.animestudiotutor.com/frame_by_frame/using_frame_by_frame_animation_in_anime_studio/
14 May 2016ShoNuff93
With the new addition to frame by frame animation layers in Anime Studio I thought I'd take a crack at making a tutorial on how to use it. As I'm also a newbie when it comes to using this new addition to the software I thought is was important to not speed up the process and "try" and talk through the process while I worked out what I was doing. It's makes for a long video but I think it helps describe some of the basic concepts of using this new layer type!
Frame by frame animation is AWESOME but it is also can be extremely time consuming! I advise anyone wanting to get into using the frame by frame option in AS to reference from amazing websites like http://flashfx.blogspot.com pinterest or deviantart to see how other animators processes! Oh and better yet, look right here on youtube for tutorials on traditional, hand drawn frame by frame tutorials. The concepts translate directly to AS so look around and see what you can find!
https://www.animestudiotutor.com/bones/fighting_and_character_interaction_in_anime_studio/
20 July 2016ShoNuff93
This tutorial is not a how to create a specific fight sequence in Anime Studio but rather some tips, tricks and techniques that will allow you to create certain movements and interactions with more than one character.
It goes over using cycles to create jumping, perpetual motion, additive cycles, the use of onion skins to help make walking movements, hot to create a punch and reaction and using reference layers to create different depths for individual parts of each character.
Making a tutorial on creating an actual complete fight scene would take days if not weeks to cover everything so think of this as more of a tips video than anything else!
If you've never created a character in Anime Studio before I suggest you watch my tutorials for designing a character and the AT-AT walker to see how to rig a character and how to use target bones. The character design tutorial also covers how I make a face rig too!
If you're looking to make a much more complex type of fight scene, look up frame-by-frame animation and fight scenes on youtube. There are a few great tutorials on the subject and don't pass up the flash ones as the principal is the same!
https://www.animestudiotutor.com/special_effects/blood_sweat_and_tears_in_moho_anime_studio_pro/
20 October 2016ShoNuff93
This tutorial shows you how to make dripping liquid using noise and the stroke exposure tool. I also use the noise effect to create blood. Really simple techniques that are quick and easy to execute!
Classic Horror 1 - Dark World by Kevin MacLeod is licensed under a Creative Commons Commons Attribution license | Source | Artist
Bump in the Night - Supernatural Haunting by Kevin MacLeod is licensed under a Creative Commons Attribution license | Source | Artist
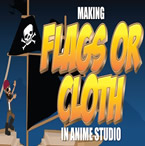
https://www.animestudiotutor.com/bones/waving_flag_or_moving_cloth_in_anime_studio/
20 July 2016ShoNuff93
This is a tutorial on how to simulate a flag or any other type of material look like it is blowing in the wind as well as how to simulate cloth movement...somewhat realistically!
This technique was NOT created by me! All credit goes to Victor Paredes.
https://www.youtube.com/user/tazatriste
For those of you who don't know, he is an Anime Studio Guru, professional animator and works with SmithMicro!
This was upload with his permission on the channel "Gilbert Concepcion". The channel seems to be inactive for a few years but you can check out his original video here!
This video covers the same concept but uses bones so you can add textures or pictures onto your object if you want to make your objects look more realistic.
The video also covers a technique I came up with a long time ago to mimic the movement of cloth. It's not perfect but you guys might find it useful for your animations!
Cortosis - Scoring Action by Kevin MacLeod is licensed under a Creative Commons Attribution license
Source | Artist

https://www.animestudiotutor.com/3d_content/3d_buildings_in_anime_studio_pro_or_moho_pro_12/
14 October 2018ShoNuff93
Hey everyone! I've been getting a lot of requests for backgrounds and a friend recently asked me about making one that has a city street with buildings. I thought it was a great idea but also started wondering if I could make it 3D so I could create a lot of different angles for the same scene.
I found that I could pretty easily and this is the result. Now this tutorial shows you how to make VERY simple buildings but given time you could make the buildings and the scene a lot more detailed with a lot more depth but I think following this tutorial will give you a basic understanding of how it works and how to organize your layers.
Yes, there are other tools to create 3D objects in Anime Studio/MOHO as well but I feel like this is the best way to understand X,Y, Z coordinates and it allows you to add details you otherwise couldn't with extrusion and beveling tools.
If you'd like to help support this channel and also get characters and artwork for your animations, check out my Patreon channel at https://www.patreon.com/poptoogi
I also wanted to give a big shout out to Justin Allen, a fellow animator who's own tutorial really helped me out by showing me how to align origin points (rotation points) so that I could easily turn and place walls making this tutorial infinitely more easy to do! He's got a great channel on youtube with awesome cartoons and amazing tutorials so check him out.
Showing tutorials 91 to 98 of 98