Search
Found 44 results for characters
https://www.animestudiotutor.com/introduction/webinar_speed_up_your_workflow/
24 June 2012Smith Micro Graphics
Join Victor Paredes as he shares with you his special techniques and tips to speed up your workflow in Anime Studio. See the various ways he creates walk cycles - one of the biggest challenges in animation. Learn how to improve head rotations in your animations as he discusses easy tracing tips, drawing for animation, using symmetry within Anime Studio, and how to use blend morphs effectively. In addition, Victor will share his insights on rigging soft shapes and show you how he brings his characters to life.
The supporting file contains the walk ruler.
https://www.animestudiotutor.com/bones/rag_doll_physics_on_a_character/
14 October 2018ShoNuff93
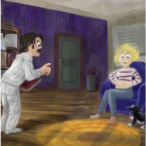
This is another physics-based tutorial in which you learn how to add physics to your character inside of an animation. You need to have the pro version of Anime Studio pro (at least version 9 I think) or MOHO 12 pro in order to use the built in physic engine.
This tutorial is easy to use but the results can vary widely due to the fact that physics animations just do what they want but that's the fun part! Playing with just a couple of settings can really change the outcome of your animations in just seconds. Sometimes they look great and sometimes they can be a twitchy mess. But if you looking for a fun easy way to automatically generate a character falling or have an object to explode, physics is the way to go!
Just play with it and have fun! Couple of things to REMEMBER, you need to have bone strength turned on for a rigged character to have physics applied to it. Also, while a character is being affected by physics you can NOT animate it! Pose your characters before and after physics is turned on!
https://www.animestudiotutor.com/images/picture_book_made_in_moho_pro_12/
1 October 2017Stayf Draws
How to Animate a Picture Book in Moho Pro 12 Using Original Illustrations. I animated my own picture book Little Angel using Moho 12. The movie is available as a movie and on iBooks with the movie included.
Little Angel on iBooks
Little Angel Movie on Vimeo:
When you want animate a picture book in Moho (formally known as Anime Studio) you first need to edit the original illustration in Photoshop. First you need to decide which parts of the scene need to be animated. Then make different layers of the characters you want to animate. If you want to use dialogue in the scene you will need different mouth shapes. When you have finished in Photoshop export your file as a PSD. Then you can import the PSD in Moho. Choose individually, then all of the layers will be exported separately. Then you can setup your character, using bones. Or for simpler animations you can also animate with the transform tool. Photoshop I did all the editing of the illustration in Photoshop 2015 and I am now using Photoshop 2017. Photoshop is part of Adobe Creative Cloud. It is available in the total Creative Cloud plan, or you can choose to go for a single license.

https://www.animestudiotutor.com/3d_content/3d_buildings_in_anime_studio_pro_or_moho_pro_12/
14 October 2018ShoNuff93
Hey everyone! I've been getting a lot of requests for backgrounds and a friend recently asked me about making one that has a city street with buildings. I thought it was a great idea but also started wondering if I could make it 3D so I could create a lot of different angles for the same scene.
I found that I could pretty easily and this is the result. Now this tutorial shows you how to make VERY simple buildings but given time you could make the buildings and the scene a lot more detailed with a lot more depth but I think following this tutorial will give you a basic understanding of how it works and how to organize your layers.
Yes, there are other tools to create 3D objects in Anime Studio/MOHO as well but I feel like this is the best way to understand X,Y, Z coordinates and it allows you to add details you otherwise couldn't with extrusion and beveling tools.
If you'd like to help support this channel and also get characters and artwork for your animations, check out my Patreon channel at https://www.patreon.com/poptoogi
I also wanted to give a big shout out to Justin Allen, a fellow animator who's own tutorial really helped me out by showing me how to align origin points (rotation points) so that I could easily turn and place walls making this tutorial infinitely more easy to do! He's got a great channel on youtube with awesome cartoons and amazing tutorials so check him out.
Showing tutorials 41 to 44 of 44