Search
Found 8 results for rotation
https://www.animestudiotutor.com/bones/pros_tip_walk_cycle/
9 February 2016McCoy Buck
Let's make a walk cycle in Anime Studio!
Breaking down the rig - 0:49
Setting up contact positions - 4:05
Setting up passing positions - 8:50
Setting up up/ down - 14:05
Setting up arms - 17:00
Setting up arm and hip rotation - 19:15
Setting up head rotation - 28:35
Free downloadable character: https://goo.gl/73O7fU
Join the Anime Studio Pro group: facebook.com/groups/AnimeStudioPros
Music by: bensound.com
https://www.animestudiotutor.com/masking/computer_diode_using_masks/
25 November 2012ShoNuff93
This is a quick tutorial on making a randomly rotating tech graphic for anime studio. Using a little masking, one keyframeand some random rotation you can create a pretty cool animation with little effort.
https://www.animestudiotutor.com/particles/light_speed_or_warp_jump_effect_in_moho/
9 June 2018ShoNuff93
This tutorial shows you how to use a single dot to make a moving star field and also how to use one line to create a space warping effect like that used in Star Wars or other types of sci-fi movies. They both are really simple and just use the rotation of particles in 3D space to make them work.
https://www.animestudiotutor.com/animation/how_to_animate_part_4/
1 May 2019mtbuck24
In this How to Animate we are going to talk about how the animation channels work so you can better understand what is happening to your animation. In this video we cover:
- Animation Channels
- Bone Scale
- Bone Rotation
- Bone Translation
- Red Animation Channel
- How Keyframes work
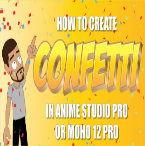
https://www.animestudiotutor.com/particles/how_to_make_confetti/
3 December 2017ShoNuff93
This is another easy-to-do particle effect that you can use to create confetti in Anime Studio Pro of MOHO Pro 12. It uses a little bit of randomized 3D rotation of a flat square to give the illusion of confetti floating downward and also uses a very subtle use of the noise effect to scatter and simulate wind and to create even more realistic movement. You can use this for parade animations, sporting events and I'm guessing a lot of people might like to use it for New Years Eve animations as well. It only takes a few minutes to set up and create various colors to keep in your library for later use!
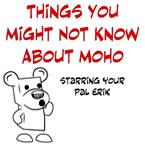
https://www.animestudiotutor.com/introduction/things_you_may_not_know_about_moho_anime_studio/
28 September 2017Square Bear Studio
Did you know that you can prevent your shapes from distorting when you add points to them (Moho only)? That you can show a layer's points and paths even when you are editing another layer? That you can easily reset to position and rotation of bones and points with one click? Moho has a ton of features, and sometimes people I speak with are surprised to find out about some of them. Brought to you by squarebear.studio
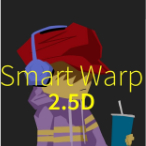
https://www.animestudiotutor.com/smart_warp_layers/25d_rig_with_smart_warp_tutorial_moho_pro_12/
1 October 2017mtbuck24
In this tutorial learn how to create a 2.5D effect for your rig in Moho Pro 12 using bitmap Photoshop layers and the new awesome feature (only in Moho Pro 12) Smart Warp
Download FREE stuff | Paid and FREE courses
Email List | Moho Pros Group |
Moho Pros Beginners Group | My other courses

https://www.animestudiotutor.com/3d_content/3d_buildings_in_anime_studio_pro_or_moho_pro_12/
14 October 2018ShoNuff93
Hey everyone! I've been getting a lot of requests for backgrounds and a friend recently asked me about making one that has a city street with buildings. I thought it was a great idea but also started wondering if I could make it 3D so I could create a lot of different angles for the same scene.
I found that I could pretty easily and this is the result. Now this tutorial shows you how to make VERY simple buildings but given time you could make the buildings and the scene a lot more detailed with a lot more depth but I think following this tutorial will give you a basic understanding of how it works and how to organize your layers.
Yes, there are other tools to create 3D objects in Anime Studio/MOHO as well but I feel like this is the best way to understand X,Y, Z coordinates and it allows you to add details you otherwise couldn't with extrusion and beveling tools.
If you'd like to help support this channel and also get characters and artwork for your animations, check out my Patreon channel at https://www.patreon.com/poptoogi
I also wanted to give a big shout out to Justin Allen, a fellow animator who's own tutorial really helped me out by showing me how to align origin points (rotation points) so that I could easily turn and place walls making this tutorial infinitely more easy to do! He's got a great channel on youtube with awesome cartoons and amazing tutorials so check him out.
Showing tutorials 1 to 8 of 8