Search Shared Files
Found 7 results for setting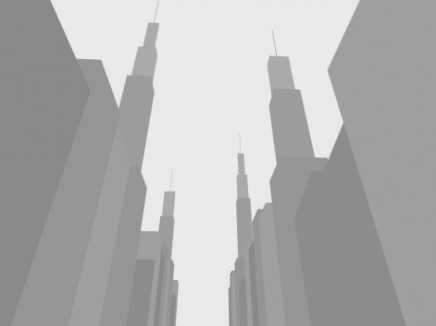
www.animestudiotutor.com/shared_files?id=9
3 May 2013 admin
3D City using the Extrude 3D layer setting in Anime Studio Pro 9
I have also included some limited animation in the timeline

www.animestudiotutor.com/shared_files?id=20
7 June 2013 admin
A 3D Earth made in Anime Studio Pro 9 using a 3D layer in the lathe setting
Earth texture link

www.animestudiotutor.com/shared_files?id=701
25 May 2020 shmu28
Little lion cub dreams of being king
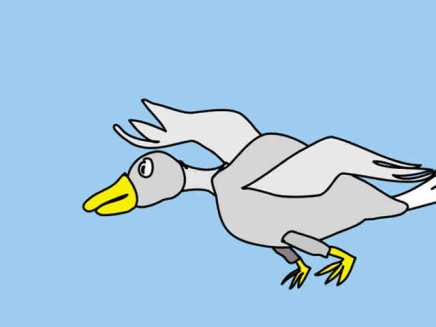
www.animestudiotutor.com/shared_files?id=518
25 March 2018 causeway
Fed up with setting up a whole bunch of layers for each "Bird" position. I made a separate file with all these layers on (But no drawings) and copy/pasted those layers every time I needed a new bird drawing.
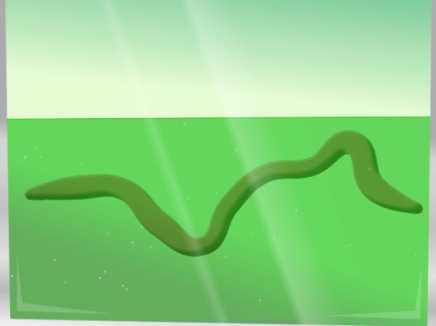
www.animestudiotutor.com/shared_files?id=289
19 April 2016 admin
The animation was done automatically by Anime Studio's physics engine.
The worm was just dropped into the 'acid/water' and the program did the rest.
The worm is in a bone layer, and the water uses the force field setting.
(No real worms were harmed in the making of this)
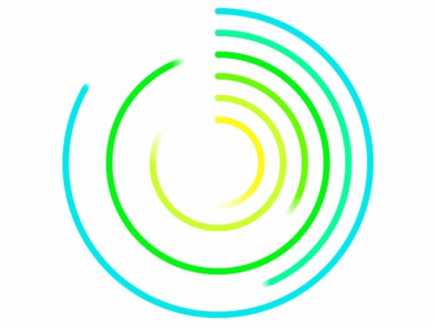
www.animestudiotutor.com/shared_files?id=424
17 August 2017 admin
Made with Moho Pro 12
The loops are created by setting the line's 'Stroke Exposure'
The timing was worked out with the Loop Calculator
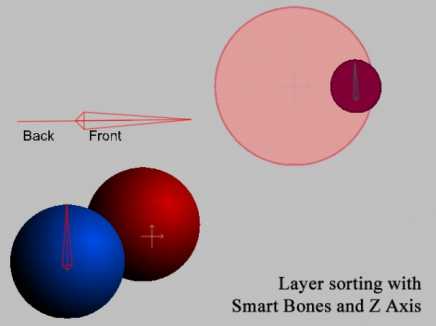
www.animestudiotutor.com/shared_files?id=40
1 August 2013 admin
*Anime Studio 9.2+ required.
As we can't yet use the 'Animated Layer Order' with smart bones, the work around is to control the layers with their Z-axis setting. In the two examples provided you will see how one smart bone moves a layer to the back or front.
The setup:
Frame 0 of the Mainline in the smart bone action (X: +0.001)
Frame 1 in the positive action of the smart bone for the layer that you need to control. (X: +0.001)
Frame 1 in the reverse action (X: -0.001)
Showing tutorials 1 to 7 of 7