Search
Found 99 results for Create Shapehttps://www.animestudiotutor.com/layers/using_brushes_to_create_scrolling_backgrounds/
21 January 2014LilredheadComics
Sometimes it may be necessary for a scene to contain a loop-able background (such as a character running and the camera following him/her). While you could copy and paste assets to try and build the backdrop, there is an easier way through the use of custom brush types. Here, we will learn how to create a custom brush and apply it to create a loop-able background.
Recorded By: Jim Mills
Narrated By: Chad Troftgruben
https://www.animestudiotutor.com/particles/how_to_make_confetti/
3 December 2017ShoNuff93
This is another easy-to-do particle effect that you can use to create confetti in Anime Studio Pro of MOHO Pro 12. It uses a little bit of randomized 3D rotation of a flat square to give the illusion of confetti floating downward and also uses a very subtle use of the noise effect to scatter and simulate wind and to create even more realistic movement. You can use this for parade animations, sporting events and I'm guessing a lot of people might like to use it for New Years Eve animations as well. It only takes a few minutes to set up and create various colors to keep in your library for later use!
https://www.animestudiotutor.com/bones/fighting_and_character_interaction_in_anime_studio/
20 July 2016ShoNuff93
This tutorial is not a how to create a specific fight sequence in Anime Studio but rather some tips, tricks and techniques that will allow you to create certain movements and interactions with more than one character.
It goes over using cycles to create jumping, perpetual motion, additive cycles, the use of onion skins to help make walking movements, hot to create a punch and reaction and using reference layers to create different depths for individual parts of each character.
Making a tutorial on creating an actual complete fight scene would take days if not weeks to cover everything so think of this as more of a tips video than anything else!
If you've never created a character in Anime Studio before I suggest you watch my tutorials for designing a character and the AT-AT walker to see how to rig a character and how to use target bones. The character design tutorial also covers how I make a face rig too!
If you're looking to make a much more complex type of fight scene, look up frame-by-frame animation and fight scenes on youtube. There are a few great tutorials on the subject and don't pass up the flash ones as the principal is the same!
https://www.animestudiotutor.com/special_effects/mandalas/
9 December 2015AnimeStudioTutor
Learn how to create an animated mandala in Anime Studio Pro 11.
Using the new reference layer feature, it is now possible to create repeating kaleidoscope patterns that can be animated.
https://www.animestudiotutor.com/introduction/whats_new_in_moho_pro_12_anime_studio/
14 August 2016Smith Micro Graphics
Everything you need to make amazing, professional animation. Moho™ Pro 12 (formerly Anime Studio Pro) offers the most powerful 2D rigging system of the market and mix it with traditional animation tools, allowing to get professional results easier and faster.
See what's new in Moho Pro 12, including:
1. NEW! Bezier Handles: Get more design control with customizable vector bezier handles. Create unique line bends with fewer points! Freehand Tools produce less points as well!
2. NEW! Select Switch Window: Lip syncing and other frame by frame animations are easier to achieve! All Switch Layers can be viewed and keyed with the Select Switch Window. Having a visual interface speeds up animation tasks!
. NEW! Smart Warp: Create custom meshes that can bend, shape, twist and animate assets. Works for both images and vectors!
4. NEW! Improved Vector Import/Export: Import or export vector files without compromise! With improved SVG support, all points, lines and colors will transfer. This creates possibilities for true multi-software workflows.
5. NEW! Realistic Motion Blur: A new setting allows for true motion blur. Control the amount of frames and blend. Apply to any moving asset for instant results!
6. NEW! New Layers Window: The column based setup allows for searching, filtering, tagging, commenting and organizing layers. The columns are customizable and finding the layers you need has never been faster.
7. NEW! Auto Freeze Pose: With Auto-Freeze Keys turned on, when you move a bone, all other bones in the rig will be keyed. This ensures body parts only move when intended. No more floating bones!
8. NEW! Animate Multiple Layers at the Same Time: Get MORE done by editing multiple layers on the timeline in Moho™ 12. No more jumping back and forth between layers for complex tasks!
9. NEW! More Timeline Enhancements: Mute individual channels to isolate actions, split X, Y and Z channels for more control over your animations and more.
10. NEW! Pin Bones: Add one point bones to alter, move and reshape assets in fun new ways. Combine with traditional bones for more complex animations. Works with both vectors and images!
https://www.animestudiotutor.com/masking/how_to_create_an_x-ray_effect/
18 February 2018ShoNuff93
This is how to create an X-Ray effect in MOHO or Anime Studio using two separate characters and then rigging them to the same set of bones. Then, all you need to do is add a little bit of masking and boom! I believe this will work for even much older version of Anime Studio as long as you've got the masking option!
https://www.animestudiotutor.com/animation/random_flickering_light/
6 March 2016ShoNuff93
This tutorial is for anyone who wants to create randomly flickering lights in anime studio. All you need to do is create two separate pieces of artwork (this can even work for photos) and use a smart bone to turn one of the layers on and off randomly. It may not seem easy at first, but once you learn how to use it you'll probably use it all the time!
https://www.animestudiotutor.com/bones/how_to_create_a_universal_eye_rig/
1 October 2017mtbuck24
In this eye rig video tutorial I am going to show you how to create a simple eye rig that you can reuse multiple times and change up to whichever style you would like.
In this tutorial we will cover:
- Masks
- Smart Bones
- Control Bones
- Simple Animations
Download file
Full course
https://www.animestudiotutor.com/animation/swarms_of_insects_or_critters_in_moho/
20 October 2016ShoNuff93
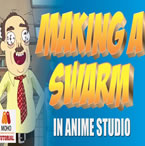
Need ants crawling around a garbage can? Or some roaches for a spooky movie scene? Maybe you want to create a pond with fish swimming around it. If so, this tutorial might help. It is a simple way to use a simple animation and particles to create moving swarms.
It uses particles and the follow path tool and a tiny bit of animation on your character and thats it. It is easy to manipulate the speed and direction of your characters with this technique. If you have any questions let me know!
https://www.animestudiotutor.com/bones/animating_a_head_turn_with_smart_bones/
21 December 2013LilredheadComics
There are many different ways to create head turns in Anime Studio. In this video, Chad and Jim demonstrate how to create a smooth head turn from front to left and then to right by using a Smart Bone dial.
Recorded By: Jim Mills
Narrated By: Chad Troftgruben
Showing tutorials 11 to 20 of 99
