Masking Basics: Hide All
Tutorial Number: 218
Made with: Anime Studio Pro 9.5
Level: Basic
Basic introduction to masking in Anime Studio. The 'Hide all' setting removes everything from the group and only shows what has been masked out. (This is the most common option when using layer masking).
Contents
1. Masking a group
Create a new group layer, then open its settings dialogue (Figure 1-1)
FIGURE 1-1 Create a new group layer
Open to the 'Masking' Tab (Point 1 in Figure 1.2) then select 'Hide all' then ok.

FIGURE 1-2 Masking Setup
You will notice the shading icon is now shown on your group.

FIGURE 1-3 Masking Icon on group
Now create a new vector layer, so there are now two, and drag them into this group. (The group's arrow icon on the left must be clicked to point down or you will not be able to drag your new layers into it)

FIGURE 1-4 2 vector layers inside group
Anime Studio will automatically change the layers so that they are masked. The layers will also be shown with icons to show this.
(If you check their masking settings you will see they have been set to 'Mask this layer'.)
Open the bottom layer's masking settings again, and set them to '+Add to mask'. This will tell Anime Studio that anything drawn on this layer should be seen as the mask.

FIGURE 1-5 Set bottom layer to '+Add to mask'
Now we have a basic masking setup using the 'Hide all' settings.
2. Time to put it to practice
Lets say we want to quickly create a shape with some shading. The shading will be messy and quick so a mask could be used to help.We'll use a star shape, but this could be face, body, object etc.
This is what we want to achieve:

FIGURE 2-1 The final image
Lets start by drawing a star shape in the bottom vector layer - try and keep the image in the center of the screen. The star shape can be found in the 'Draw Shape' menu.

FIGURE 2-2 Create a star shape

FIGURE 2-3 Draw a star on the bottom layer and colour it yellow
In the layer above, draw a triangle that covers half the star and colour it a darker colour. You should notice that anything drawn on this top layer will only show where it has been masked by the bottom layer.

FIGURE 2-4 Draw the shading
When we select the top mask group, you'll see the final result.
3. How masks work
Imagine a camera is looking from the bottom up of your group.The bottom mask is filled with black, and anything drawn in that mask will cut a hole by clearing this mask.
The final image will be anything seen from within this hole.

FIGURE 3-1 Masking Group Setup
4. Example 1 - Shadows and highlights
See 'Supporting Content' below for example files.You can easily create shadows and highlights with this method.

FIGURE 4-1 Shading with masking
Notes:
The black and white shapes have a fill with the transparency set to around 25% (render to see final result)
The bottom masking layer has the 'Exclude Strokes' ticked in the Masking options (to show the outline correctly, or the lines would be masked too).
5. Example 2 - Textured Layers with Masks
Create a group, and add two vector layers as in step 1.In the bottom mask layer, create your shape, apply a thick line, and use a brush that looks 'fluffy'.

FIGURE 5-1 Select a 'Fluffy' brush
On the layer above, draw a shape larger than the image you just created on the bottom layer, and fill with a textured pattern.
Tip
You can use bones to move these layers. Flexi-Binding* works best.
Apply a drop-shadow effect to the group layer and you will get something like this:

FIGURE 5-2 Texture Example
*Use the help (.pdf file) in Anime Studio for more info on Flexi-Binding.
Supporting Content
Download Details
Zip File Size: 230KB
Last updated: 23 Feb 2014 15:01:56
Made with: Anime Studio Pro 9.5
File Name: anime_studio_tutor_files_218.zip
Last updated: 23 Feb 2014 15:01:56
Made with: Anime Studio Pro 9.5
File Name: anime_studio_tutor_files_218.zip
Rate This Tutorial
Once you have completed this tutorial, please give it a rating:
6 Rates
(4.8)
Comments
Be the first to add your voice here!
Please first login to add your comments
Other Tutorials In This Category
-
 Smart Bones and Masking in Anime Studio1 Rating (5)
 -
 How to create a mirror in Anime Studio2 Rates (5)
 -
 Animating words with masking4 Rates (4.8)
 -
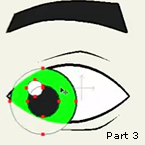 Eye Rigging Part 33 Rates (5)